Why a Radon Assessment Home Inspection Matters Before You Buy or Renovate
When I bought my first house in St. Louis, radon was the last thing on my mind. The home inspector checked the roof, the foundation, the HVAC system, and even the gutters. But nobody mentioned testing for an invisible radioactive gas that could be seeping through cracks in the basement floor. That oversight could have cost me more than a few thousand dollars down the road. Over the past decade working in indoor air quality and radon mitigation, I have seen too many families find out about radon the hard way. A proper radon assessment home evaluation is not just a checkbox on a due diligence list. It is the only reliable way to know what you are actually breathing inside your own house.
The science behind radon is straightforward. Uranium in the soil decays into radium, which then releases radon gas. That gas moves through soil gas and into buildings through radon entry points. These include gaps around pipes, cracks in concrete slabs, sump pump openings, and even the tiny pores in a block wall. Once inside, radon can accumulate to levels that the EPA considers a health risk. The agency estimates that radon causes more than 20,000 lung cancer deaths each year in the United States. But here is the thing: you cannot smell it, see it, or taste it. The only way to know your exposure is to measure it.
What a Radon Assessment Actually Involves
A radon assessment home evaluation is more than placing a plastic detector in the basement for a few days. A thorough assessment starts with understanding the building's construction, the soil type, and the potential pathways for radon entry. The person conducting the test should note the location of the sump pump, any unfinished crawl spaces, and the condition of the concrete floor. They should also check for signs of moisture because high humidity can interfere with some radon detectors. In St. Louis, where clay soils and limestone bedrock are common, radon levels can vary dramatically from one house to the next. That is why a single reading from a neighbor's house does not tell you anything about your own risk.
For a short-term test, the most common method is to use a charcoal canister or an alpha track detector. These are placed in the lowest livable level of the home for two to seven days. The key is to keep windows closed as much as possible during the test period and to avoid running exhaust fans that could pull in outdoor air. A more detailed picture comes from a continuous radon monitor, which records radon levels hour by hour. This device can show spikes that happen overnight or during a rainstorm, which a passive detector might average out. For a radon assessment home inspection, a continuous monitor gives you a richer data set and helps identify patterns.
I once tested a house in the St. Louis suburbs where the short-term charcoal test came back at 3.2 picocuries per liter, just below the EPA action level of 4.0. The homeowners were ready to move on. But I recommended a follow-up with a continuous radon monitor. The monitor showed that every evening around 8 PM, radon levels spiked above 6.0 and stayed there until morning. The house had an intermittent radon problem that the short-term test missed entirely. That extra data changed the mitigation strategy completely.
Testing Is Only Half the Picture
A radon assessment home evaluation does not stop at measuring the gas. It also includes a visual inspection of the foundation and the mechanical systems that can affect air pressure. A house with a radon problem is usually under negative pressure relative to the soil. That negative pressure pulls soil gas inside. The assessor should look at the furnace, the water heater, and the clothes dryer. All of these appliances exhaust air outside, which can depressurize the house and increase radon entry. In some homes, simply sealing obvious cracks and ensuring combustion appliances have enough makeup air can reduce radon levels significantly. But in many cases, you need an active soil depressurization system.
Active soil depressurization, also called sub-slab depressurization, works by creating a vacuum under the concrete floor. A radon fan pulls soil gas from below the slab and vents it safely above the roofline. The system includes a manometer, which is a simple gauge that shows whether the fan is operating correctly. If the manometer reading drops, you know something is wrong. A properly designed radon mitigation system can reduce radon levels by 90 percent or more. After installation, a post-mitigation radon test confirms that the system is working. This test is just as important as the initial assessment. Without it, you are guessing.
One common mistake homeowners make is thinking that radon sealing alone will fix the problem. Caulking cracks and sealing gaps around pipes is a necessary step, but it rarely solves the issue entirely. Radon can travel through soil and find new pathways. A house that has been sealed but does not have active depressurization can still have elevated levels, especially during cold weather or when the furnace is running. That is why the EPA recommends active soil depressurization as the most reliable long-term solution for most homes.
Radon in Water Adds Another Layer
Most people think of radon as a soil gas, but radon in water is also a concern, especially for homes with private wells. When water containing dissolved radon is agitated, for example by a shower or a washing machine, the gas is released into the air. Inhaling radon from water poses a greater risk than drinking it. A complete radon assessment home test should include a water sample if the house uses groundwater. The mitigation approach is different: aeration or granular activated carbon filtration can remove radon from water before it enters the house. In St. Louis, where many suburban homes still rely on wells, this is a step that gets overlooked too often.
New Construction Does Not Automatically Mean Safe
Another misconception is that new homes are radon-free. Radon resistant new construction techniques have improved, but they are not always installed correctly or at all. A vapor barrier under the slab, a layer of gravel for drainage, and a passive vent pipe extending through the roof are standard in many codes. But I have inspected brand-new homes where the vent pipe was capped inside the attic or the gravel layer was missing entirely. The only way to know is to test. A radon assessment home inspection for a new house should happen after the first heating season, when the stack effect is strongest and radon levels are most likely to peak.
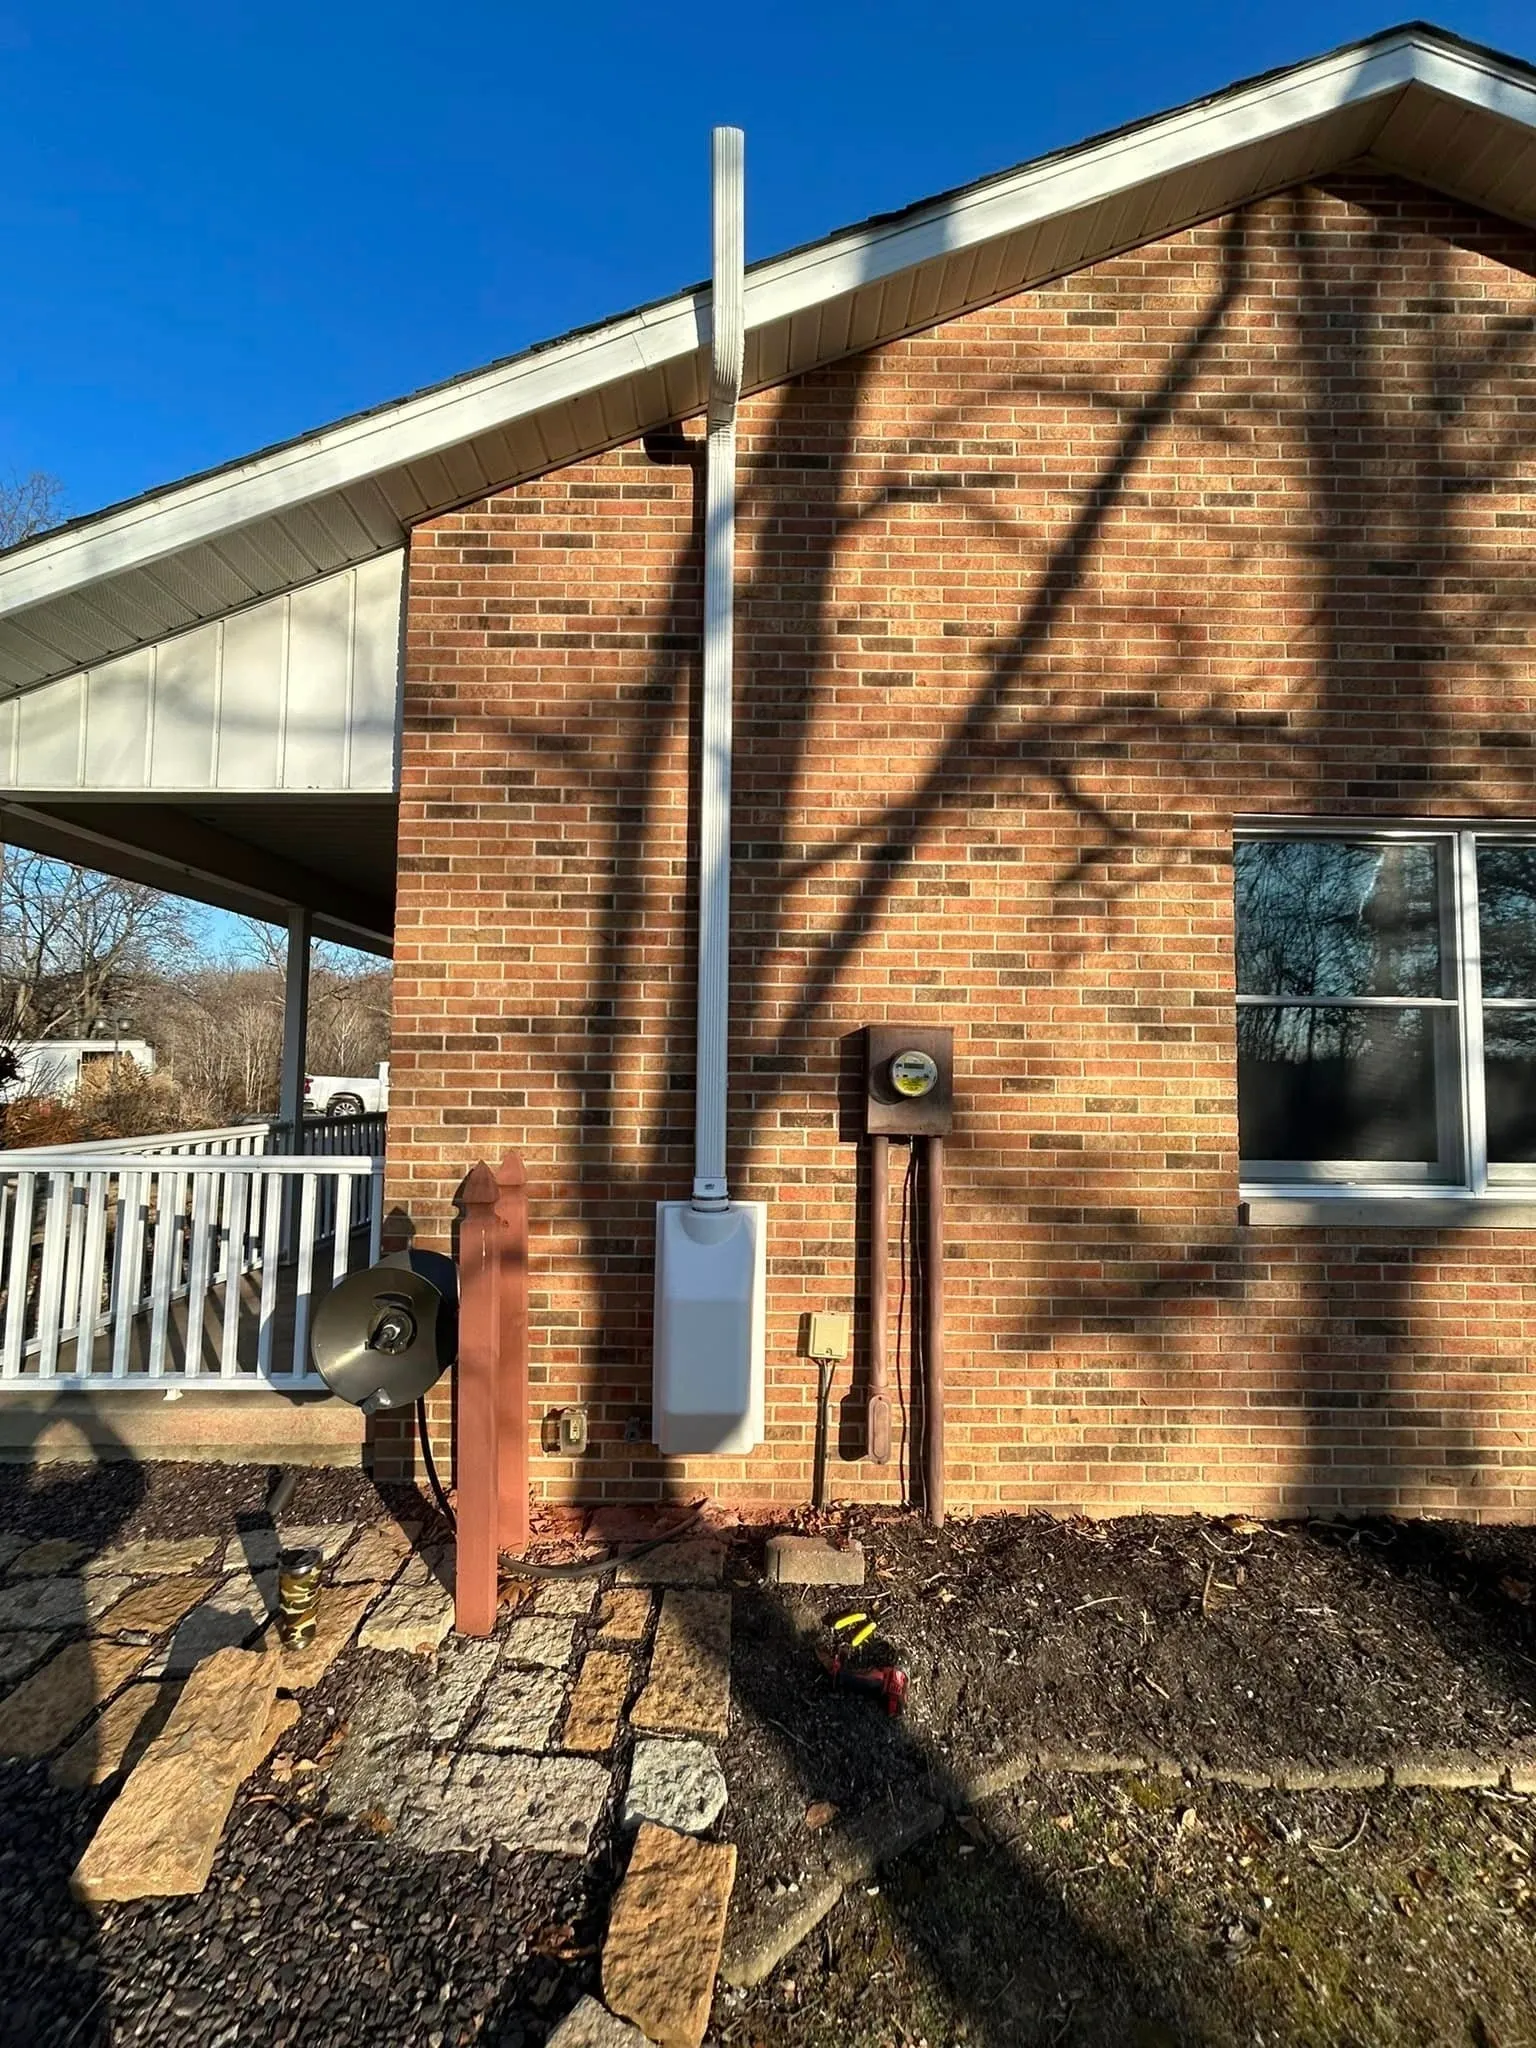
If you are buying a newly built home, ask the builder for documentation of radon resistant features and request a test result. If they cannot provide one, hire an independent tester. The cost of a radon test is trivial compared to the cost of retrofitting a mitigation system later. I have seen builders in St. Louis voluntarily include a radon fan and a manometer in new homes, even when local code does not require it. That is a sign of a conscientious builder. But you should still verify with a post-mitigation radon test after you move in.
What to Look for in a Radon Professional
Not everyone who offers radon testing is equally qualified. Look for someone who is certified by the National Radon Proficiency Program or the National Radon Safety Board. They should use calibrated equipment and follow the EPA's testing protocols. A good radon assessment home evaluator will also explain the results in plain language and recommend specific next steps. They should not push you into a mitigation system you do not need, nor should they dismiss a borderline reading as nothing to worry about. A professional in St. Louis who works with companies like Air Sense Environmental understands the local geology and the common construction styles in the region. That local knowledge matters because radon entry is highly site-specific.
I remember a job where the homeowner had done his own charcoal test and gotten a reading of 7.8 picocuries per liter. He called a mitigation company and they quoted him for a full sub-slab depressurization system. But when I walked through the house, I noticed that the basement had a sump pump that was not sealed, and the furnace was drawing combustion air from the basement. After sealing the sump and adding a dedicated combustion air intake for the furnace, radon levels dropped to 2.1. The system cost less than a tenth of the original quote. A thorough radon assessment home inspection could have saved that homeowner thousands of dollars and unnecessary construction.
The Bottom Line on Radon Testing
Radon is a local problem with a simple solution, but only if you know it is there. Testing is cheap, easy, and the only way to make an informed decision. Whether you are buying a home, selling one, or just want to know what your family is breathing, start with a radon assessment home evaluation. Do not rely on a neighbor's test or a guess based on the age of the house. Get a real measurement from a qualified professional. If the levels are high, a radon mitigation system can bring them down to safe levels. If they are low, you have peace of mind. Either way, you have data instead of worry.
In St. Louis, where the soil and climate can produce unpredictable radon patterns, a one-time test is a good start but a continuous radon monitor gives a better picture over time. Consider leaving a monitor in the basement for a full year, especially if you are planning a renovation that might change the air pressure in the house. Renovations that involve digging around the foundation, adding a basement bathroom, or finishing a basement can create new radon entry points. A pre-renovation baseline test and a post-renovation follow-up test are both worth the investment.
The science is settled. The mitigation methods are proven. The only missing piece is awareness. And that starts with one simple step: a proper radon assessment home inspection. Do not skip it.